Welcome to the art of orderly transformation. Embarking on a kitchen or bath remodel can be an exhilarating journey, reshaping the very heart of your home into a space that reflects your unique style and needs. But, as with any grand adventure, the key to navigating the path smoothly lies in meticulous preparation and organization and a remodel project binder.

As an experienced project manager assistant, I’ve seen the magic that a well-organized approach can bring to what might otherwise be a chaotic process.
Enter the humble binder – a powerful ally in your quest to keep your project on track. Far from just a school supply, a binder can become your command center, holding the blueprint of your vision, the nuts and bolts of your budget, and the timeline that will guide you to completion. It’s where your dreams meet the details.
Whether you’re a first-time remodeler or a seasoned pro, this guide will walk you through the ins and outs of creating a comprehensive project binder. We’ll cover everything from gathering inspiring designs to managing budgets, from scheduling to sample collecting, and from checklists to completion. So, grab your favorite binder, and let’s start organizing for success. Your dream remodel awaits.
The Importance of Organization in Remodel Projects
Imagine setting sail on the vast sea without a map or compass—daunting. That’s what diving into a kitchen or bath remodel feels like without the anchor of organization. The complexities of remodeling are many, from coordinating contractors to selecting the perfect shade of paint; each detail is a cog in the wheel of your project’s success.
Being organized isn’t just about neatness—it’s about being in control. It’s the difference between a project that flows and one that flounders. With a well-organized binder, you’ll confidently navigate the remodel, knowing that every piece of important information is correct at your fingertips.
A binder turns chaos into clarity. It allows you to categorize the myriad elements of your remodel into manageable sections.
Design ideas? Check. Budget breakdowns? Sorted. Schedules and deadlines? It is laid out clearly—no more frantic searches for that elusive quote or the lost note about your dream countertop. Instead, you’ll find peace of mind and a clear path forward with all your project details securely stored and easily accessible.
And let’s not forget the power of a tangible tool in the digital age. Something is reassuring about flipping through physical pages, each representing a stepping stone toward your goal. Plus, your binder remains reliable and immune to battery life and internet whims in a world of tech glitches and digital overload.
In the following sections, we’ll build your binder, transforming it into a remodel project’s best friend. It’s time to take the helm with your trusty binder by your side, steering your remodel to the shores of success.
Getting Started with Your Project Binder
Embarking on the organization journey for your remodel project begins with selecting the perfect binder – the treasure chest for your plans, ideas, and documents. The binder you choose is the vessel that will carry you from the first swatch to the final inspection, so let’s make sure it’s sturdy, spacious, and, why not, stylish, too.

First, consider size and durability. A thick, 3-inch binder with a D-ring allows ample space and more accessible page-turning. Opt for a customizable cover to insert a title page and spine label for quick identification. Your binder should be robust – after all, it will be your sidekick through the ups and downs of remodeling.
Now, let’s talk about the heart of your binder – the sections. Each section will be a dedicated compartment for different aspects of your project:
- Design Inspiration: A collage of your vision, the aesthetic soul of your remodel.
- Budget: The financial backbone, keeping your numbers in check and transparent.
- Quotes and Invoices: Home to cost breakdowns and payment tracks.
- Timelines: The chronological blueprint outlining what happens when.
- Samples: Tangible snippets of your materials and colors.
- Checklists: The taskmaster ensures nothing falls through the cracks.
Clear plastic sleeves protect documents within these sections, while tab dividers help you flip to the right page without a hitch. Consider pockets or pouches for loose items like fabric swatches or hardware pieces.
And for those who thrive on color-coding, grab a set of highlighters or colored tabs to assign hues to different categories or priorities. This makes your binder a feast for the eyes and an efficiency powerhouse.
With your binder ready, you’re not just organizing your remodel; you’re crafting a narrative of creation step by step. So gather your materials, and let’s turn the page to the next chapter in your remodeling story.
Design Inspiration and Notes Section
Picture your binder as a canvas, waiting to be filled with strokes of inspiration. The Design Inspiration and Notes section is where your vision blooms, a collage of creativity and personal flair. Here, you’re not just organizing ideas; you’re curating the essence of your future sanctuary. Start by dedicating a section to your muses.
Whether it’s a tear-out from a magazine, a printout of a serene spa bathroom, or a snapshot of a friend’s farmhouse kitchen that makes your heart sing, gather these gems and give them a home. Use sheet protectors to preserve these pages of inspiration, allowing you to revisit them without wear and tear.

Accompany these visuals with detailed notes. Did a particular tile pattern catch your eye? Jot down what you loved about it—envisioning a rain shower head? Please make a note of why it’s a must-have. These annotations are invaluable, serving as reminders of what sparked joy in the first place.
Don’t shy away from sketching your ideas next to your clippings. These rough drawings can be powerful communication tools with contractors and designers, conveying your thoughts more clearly than words alone.
In this section, it’s also wise to include a subsection for brainstorming and free-writing. Here, you can spill your thoughts and ponder over the function and flow of your spaces. It’s a place for questions, considerations, and those lightbulb moments that often come when you least expect them.
Your binder’s Design Inspiration and Notes section isn’t just about organization—it’s about laying the foundation for a space that resonates with your identity. It’s a living, breathing repository that evolves with your project, ensuring that your initial spark of inspiration illuminates the entire remodeling journey.
Mastering the Budget and Expenses Section
In the symphony of remodeling, the section is the rhythm section—steady, steadfast, and essential for harmony. This binder segment is the financial command center, a transparent ledger of your remodeling economics. It’s where you balance dreams with pragmatism, ensuring your vision is grounded in financial reality.
Begin with a budget overview: a spreadsheet highlighting your project’s costs. Allocate columns for estimates, actuals, and the variance between the two. This is where you’ll track every note, from the high trebles of labor costs to the bass lines of material expenses.
Next, insert subsections for detailed quotes, bids, and contracts. Sleeve each document meticulously, and consider using color-coded tabs to differentiate between confirmed contracts and estimates still in negotiation.
Receipts and invoices form the next chorus. By filing these systematically, you’ll have a chronological trail of your spending, which is instrumental during tax season or if you’re ever auditing your project’s financial history.
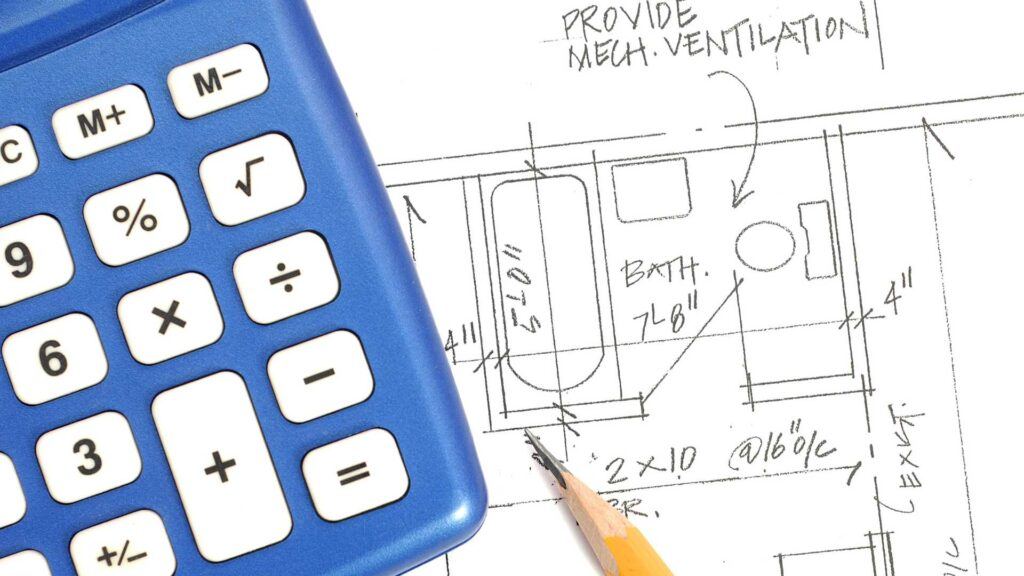
Lastly, leave space for contingency plans—a section for unexpected costs. Here, you can note solutions for potential budget overruns, keeping your financial plan as fluid, and solutions for potential budget overruns, keeping your financial plan as fluid and adaptable as the project.
By orchestrating the Budget and Expenses section precisely, you’ll ensure that every penny is accounted for, every decision is informed, and every step forward is taken confidently. It’s not just about numbers; it’s about conducting your project’s financial score to a successful crescendo.
The Project Timeline: Your Remodel Roadmap
The Project Timeline section is your remodel’s heartbeat, a pulsing timeline that charts the lifecycle of your project from inception to completion. It’s a visual representation of your journey, a roadmap showing where and how you’ll get there.
Crafting this timeline begins with the big picture—a calendar view of your project. It’s a broad-stroke sketch of start and end dates, a frame within which the finer details will be painted. This bird’s-eye view allows you to step back and see the project as a whole, ensuring you’ve accounted for the ebb and flow of each phase.
Break down your grand timeline into granular tasks. Start with the milestones—the significant achievements that will mark progress. These are your guideposts, such as the completion of demolition, the arrival of the cabinetry, or the start of painting.
Then, map out the smaller tasks that lead to these milestones. Assign realistic timeframes to each, and remember to factor in a buffer for those unforeseen delays that are all too familiar in the remodeling world. This detailed schedule becomes a living document you’ll adjust as your project evolves.
Incorporate a tracking system to mark completed activities. A simple checkmark can be a small but satisfying indication that you’re moving forward. This section is not just a plan; it’s a record of your progress, a narrative of your project’s growth.
With the Project Timeline section, your binder doesn’t just hold plans—it tells a story. The story of anticipation, of challenges faced, and of milestones reached. It’s the chronicle of your remodel, unfolding one day at a time.
Organizing Quotes, Invoices, and Vendor Communications
Navigating the waters of quotes, invoices, and vendor communications with finesse turns a chaotic sea into a calm harbor. This section is the communication hub, the command center for dialogue with craftsmen, suppliers, and service providers. Here, organization isn’t just about order; it’s about building and maintaining a bridge between your dreams and the professionals who will bring them to life.
Begin by creating a subsection for each vendor. This compartmentalization allows you to locate specific correspondence or documents swiftly, saving precious time and avoiding mix-ups. The quotes, invoices, and communication records are arranged chronologically within each subsection. This way, the history of your interactions unfolds in an orderly narrative.
For quotes, consider including a summary sheet at the beginning of the subsection highlighting the key details: vendor name, contact information, date of quote, total cost, and the scope of work. This snapshot view enables you to make quick comparisons and informed decisions without wading through pages of details.
Invoices require meticulous tracking. A dedicated pouch or sleeve for receipts ensures that nothing gets lost. Pair this with a log entry for each invoice, noting the payment date and method, so your financial oversight is comprehensive and transparent.
Lastly, document your communications. Whether it’s email printouts or notes from phone calls, these records are crucial. They provide context for decisions made and serve as a reference for any future discussions or disputes.
This section of your binder is a testament to the collaborative nature of remodeling. Keeping your quotes, invoices, and communications in impeccable order is not just organizing — you’re honoring the many relationships that transform your remodel from blueprint to reality.
Home Remodel Project
Binder Checklist
- Binder Setup
- Sturdy 3-ring binder
- Customizable section dividers
- Clear pocket sleeves for documents
- Index or table of contents page
- Inspiration Section
- Magazine cutouts or printouts of design ideas
- Notes on preferred styles and themes
- Color scheme ideas
- Budget Section
- Detailed budget breakdown
- Cost comparison sheet
- Expense tracking log
- Quotes & Estimates Section
- Contractor quotes and estimates
- Service provider contact information
- Warranty and guarantee documents
- Timeline Section
- Project timeline overview
- Key milestone dates
- Schedule adjustments log
- Samples Section
- Paint swatches
- Fabric samples
- Flooring and tile samples
- Countertop material samples
- Checklists Section
- Pre-remodel planning checklist
- Materials and supplies checklist
- Daily and weekly task checklist
- Contracts & Legal Documents Section
- Signed contracts with contractors
- Permit documents
- Insurance documents
- Communication Log
- Record of conversations with contractors
- Email correspondences
- Notes from meetings
- Miscellaneous Section
- Personal notes and observations
- Miscellaneous receipts and invoices
- Inspirational quotes or affirmations
- Final Review & Closure
- Post-project review notes
- Final budget reconciliation
- Feedback forms for contractors
This checklist ensures that all aspects of a home remodel project are organized and easily accessible. You can adjust the sections and items based on the specific needs of your project.
The Final Walk-Through: Checklists and Fine Details
The Final Walk-Through section is the crescendo of your planning symphony, a meticulous review ensuring every detail sings harmoniously before the curtain call. This part of your binder is dedicated to the checklists and fine points that will guide you through the final stages of your remodel, a systematic approach to ensuring nothing is overlooked.
Craft a comprehensive checklist that encompasses every aspect of the project. From the proper installation of fixtures to the flawless finish of paintwork, this list is your ultimate quality control tool. Each item on the checklist is a promise to yourself, a commitment to perfection in your remodel journey.
Detail a subsection for each room or area involved in the remodel. Within these, include specific items to inspect, test, and approve. This granular approach ensures that each space receives the attention it deserves and nothing is left to chance.
Incorporate a sign-off sheet to document the completion of each phase. These sign-offs provide a clear trail of accountability and satisfaction as each stakeholder in the project—from contractors to inspectors—places their mark of approval.
Equip yourself with a section for notes on any last-minute tweaks or adjustments. It’s the space for those final touches that make a house a home, ensuring that your personal touch is evident in every corner.
As you conduct your final walk-through, armed with your checklists and an eye for detail, you’ll find confidence in the knowledge that your project is not just completed but completed to your exacting standards. This section is the final note in your remodel masterpiece, the seal of a well-planned, beautifully executed vision.
Post-Project Review: Learning for the Future
The Post-Project Review is the encore of your remodeling performance, a reflective look back that allows for a standing ovation or a thoughtful critique. This final chapter in your binder isn’t just a wrap-up; it’s an invaluable repository of insights and wisdom garnered throughout your remodeling odyssey.
Commence this section with a retrospective overview. Here, you’ll encapsulate the successes and challenges, the expectations met, and the surprises encountered. This narrative provides a holistic view of your project, celebrating the milestones achieved and acknowledging the hurdles navigated.
Next, delve into a detailed analysis of each phase of the remodel. Assess the planning, execution, and coordination, noting what worked seamlessly and what could be finessed. This exercise isn’t just about accountability; it’s about understanding the rhythm and flow of your project’s lifecycle.
Include a feedback subsection for personal reflections, observations from family members, and reviews and comments from contractors and designers. This chorus of perspectives enriches your understanding and appreciation of the project’s impact.
Construct a lessons-learned ledger, a collection of insights to inform future projects. Whether it’s a note on vendor reliability, material durability, or design functionality, these lessons are the golden nuggets from the river of your experience.
Cap off this section with a vision for the future. How has this project shaped your understanding of home improvement? What would you replicate or revise in your next venture? This forward-looking outlook plants the seeds for your next grand project, ensuring that each remodels is not an end but a link in your home’s evolution.
In the Post-Project Review, your binder transforms from a planning tool into a historical document that holds the creation story and the blueprint for your next dream.
Celebrating and Sharing Your Success
The final page of your project binder is less about what’s written on paper and more about the story it tells—a narrative of transformation not just for your home but for you as a project manager. This section is your victory lap, a chance to celebrate your remodel’s completion and share the journey with others who may be embarking on their own.
Start with a celebratory note, a heartfelt reflection on the project’s completion. It’s a space to express gratitude to those who worked with you, supported you, and contributed to the success of the remodel.
Assemble a before-and-after photo gallery. These visual testaments to your project’s evolution are powerful and satisfying. They offer not just a comparison of spaces but a timeline of effort, decision-making, and aesthetic transformation.
Compile testimonials and reviews from all parties involved. Positive feedback from contractors, designers, and family members validates your success and is a commendation for future projects and referrals.
Create a section for sharing your experience, whether it’s through a blog post, a social media thread, or a community presentation. Your journey could light the way for others, giving them the inspiration and confidence to start their remodeling adventures.
Include a celebration checklist. Whether it’s a small gathering with close friends or a grand open house, mark the completion of your project with an event that suits your style. This checklist ensures your celebration is as organized and thought-out as the remodel.
Maintaining Your Remodel: A Living Document
Your project binder, now a testament to your hard work and meticulous planning, becomes a living document in this next phase. It’s not just an archive of what has been accomplished; it’s an active guide for maintaining the beauty and functionality of your newly remodeled space.
Begin with a maintenance schedule detailing the seasonal and annual tasks that will keep your remodel looking pristine. Whether it’s resealing countertops, touching up paint, or servicing appliances, this calendar is your roadmap for upkeep.
Include a warranty and product care section. Here, store all warranties, care instructions, and recommended maintenance for materials and appliances used in your remodel. Having this information at your fingertips ensures you can promptly and correctly address any issue.
Provide a directory of service professionals—contractors, plumbers, electricians—who are familiar with your home and project. This contact list is invaluable for scheduling routine maintenance or addressing unexpected repairs.
Keep a journal for ongoing updates and upgrades. As your needs evolve, so will your space. This section notes any changes or additions and keeps the history of your home’s transformation current—finally, reserve space for questions and observations. As you live in your newly remodeled home, you’ll discover new insights and perhaps even new needs. Documenting these will help you adjust your maintenance plan and inform future projects.
The Ripple Effect: Beyond the Binder
As the final entry in your project binder, this section reflects on the broader impact of your remodel. It’s about recognizing how your project influences your life, home value, and community. This is where you document the ‘ripple effect’ of your efforts, the waves of change that extend beyond the pages of your binder.
Firstly, explore the personal growth you’ve experienced. This remodel has been more than a space transformation—a journey of skill-building, problem-solving, and creativity.
Capture the new competencies you’ve developed and the confidence you’ve gained in managing complex projects.
Discuss the added value to your home. A successful remodel doesn’t just beautify—it enhances. Detail the potential return on investment and the increased comfort and functionality that benefit everyone under your roof.
Consider the environmental impact. Reflect on the sustainable choices made throughout the project. Whether it’s energy-efficient appliances or repurposed materials, recognize the steps you’ve taken towards responsible stewardship of your space.
Acknowledge the community connections you’ve forged. From supporting local businesses to hiring neighborhood artisans, your remodel has contributed to the local economy and can inspire your neighbors to pursue their home improvement dreams.
Finally, envision the future. How will your changes adapt to your life’s evolving chapters? This section is an invitation to dream, to imagine the stories that will unfold within the walls you’ve so lovingly crafted.
Continue Your Learning Journey…
Your Dream Kitchen Planner
Ultimate Step-by-Step Guide

How to Create an Organized Project Binder
Setting a Realistic Budget for Your Kitchen Makeover
Kitchen Remodel Planning Checklist
The Art of Bathroom Renovations
Ultimate Step-by-Step Guide
